As I continue to explore the world of retro-computing, bringing back memories of my late teens and early twenties, I’m constantly amazed at just how big the retro-computing scene is. I’m also amazed that, given all the new interfaces for program storage like the SMART Card and DivMMC, retro-computer users still like the ‘experience’ of loading programs the old way, i.e. from tape. Personally, I am very happy to use a more modern instant loading system but I came across the TZXDuino and that piqued my interest. Mainly because of the tell-tale ‘duino’ part of the name. Further investigation led me to the Tapuino and other such devices.
All these devices allow you to store programs on an SD-Card and send them to the computer, in my case the Sinclair Spectrum, in audio. This basically replaces the tape machines of old with a completely reliable piece of hardware, avoiding the dreaded ‘r Tape Loading Error, 0:1’ from appearing.
What attracted me to the various designs is their simplicity. The main parts are an AVR (be it Arduino Nano, Uno, Mega or bare ATMEGA328), an SD-Card module and an LCD/OLED Display. Also some buttons for control. That’s it! All the magic is in the code. Currently at version 1.7b, written by Andrew Beer & Duncan Edwards.
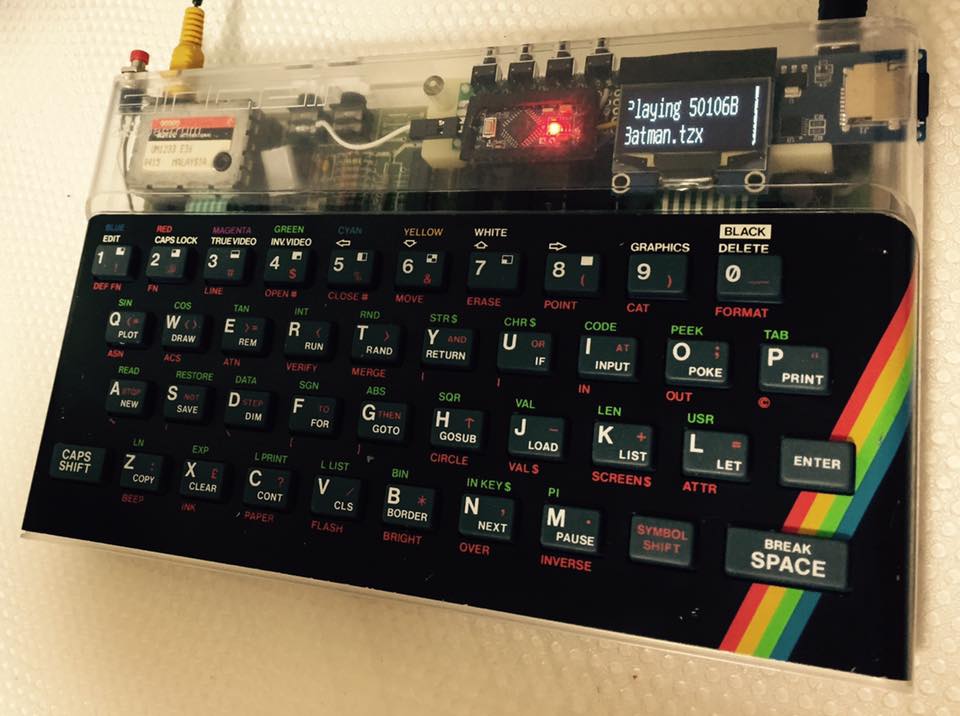
Having looked at a few of the many designs, I went for one with an OLED display after seeing Davide Barlotti’s amazing internal build.
Davide Barlotti’s Internal TZXDuino

TZXDuino Prototype
I was very pleased when it worked first time, usually I have issues with breadboards! I successfully loaded some of my original games, starting with my favorite Knightlore. The interface is simple; you scroll to the file you want, or into a sub-folder and when you have the file you wish to play highlighted, you simply press play after setting the computer into loading the program from tape as usual. I do understand the attraction of experiencing the original loading procedure. Along with owners of the original Spectrum, I went through this process countless times!
Now I had proved the prototype worked, I moved to design a PCB to house the modules and controls. I’m intending to power the device from the Poundland Power Banks I recently purchased, so I included a mini-USB connector for power input along with the usual DuPont style header. I have also included a polarity protection diode in case the header connections get reversed. The power is routed over to an ATMEGA328 and the OLED Display and Micro-SD Card modules. I have designed the board to accept the modules being the easiest way of construction. There are also four holes for later mounting in a case or for securing feet.

TZXDuino Compact v1.00 KiCad 3D Preview
I call this the TZXDuino Compact. I will shortly be ordering PCBs to test the design and, as per usual, once proved the design files will be available on this site.
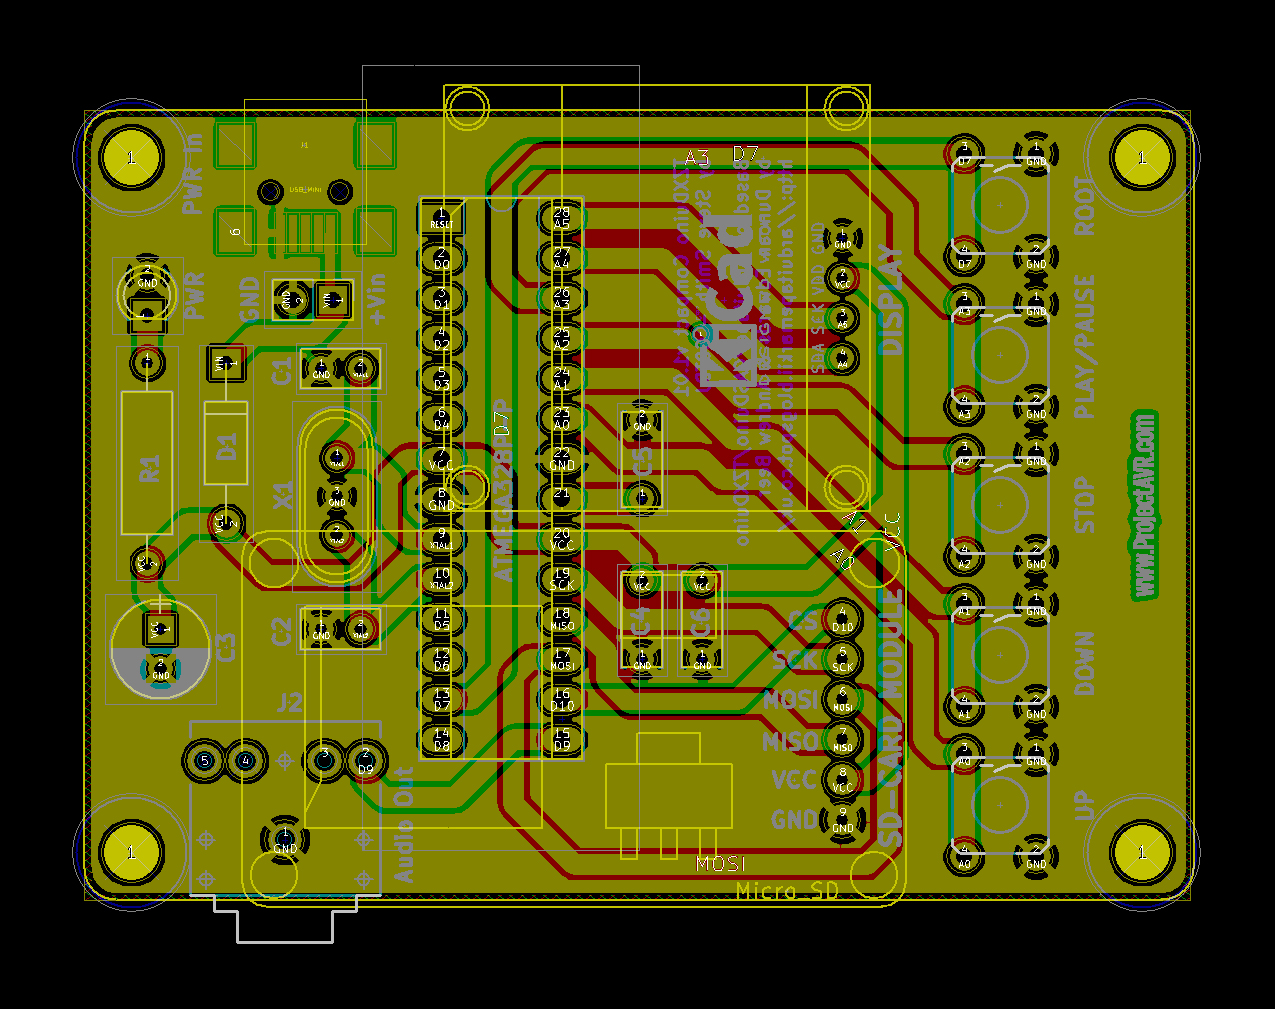
TZXDuino Compact v1.00 KiCad Preview
I have been focusing on the TZXDuino, which is primarily for the Sinclair ZX Spectrum but the device can operate with other machines and lots of other filetypes.
- TZXDuino plays TZX/TAP/CDT/P/O files.
- CASDuino plays CAS files for MSX and Dragon.
- Arduitape plays WAV files (up to a max of 22050Hz)
You can find details on the Arduitape Facebook Page.