Whilst waiting for the minDUINO v1.5/6 boards to appear, I took part in my local radio club’s DF Hunt (Direction Finding – Find the hidden station). As it is, myself and my team colleague, Ian G7PHD won the contest! Although we won, it wasn’t easy. The problem was that we didn’t have a measured of attenuating the transmitted signal for when we started to get closer to the hidden station. This meant that the signal got so strong, wherever we pointed our antennas, the signal was very strong and wouldn’t indicate a direction. I did use the trick of covering the antenna on the receiving radio with my hand but it’s a stop-gap measure. It did turn out to be effective in this instance but a proper switched attenuator would have made life a lot easier.
So, I decided to find a design and make a layout. I searched online and found a likely circuit – here. This is a standard kind of design and exactly what I was looking for. As I started laying the circuit out in Eagle, I found that no DPDT (Double Pole, Double Throw) switches had a symbol that matched the way the circuit was laid out. So I found one that was close and made a custom part. I have had to do this several times recently so it wasn’t too much of a task. There are tutorials on YouTube and such for this procedure.
Once I had the schematic laid out, I proceeded to lay out a PCB. This turned out to be pretty easy and all on one layer too.
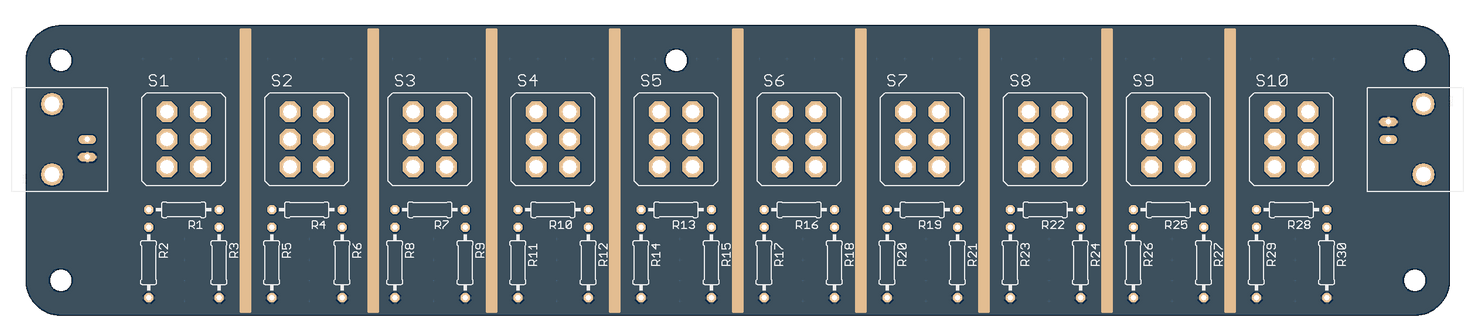
RF Stepped Attenuator Gerblook Preview – Top
This is a Gerblook preview. You can see the tStop lines of exposed copper. This is to solder shims on to shield each individual section to isolate them from each other signal wise. There are similar ones on the back but there is a gap where the connection goes through.
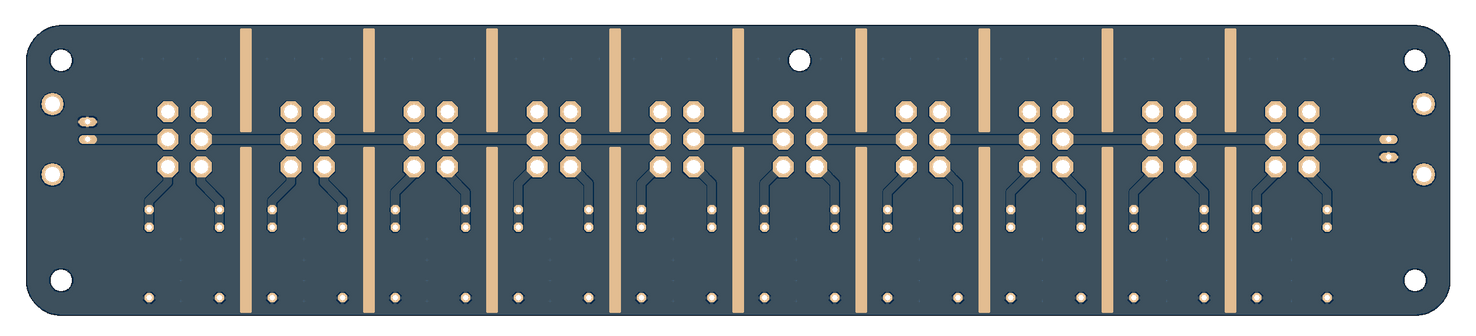
RF Stepped Attenuator Gerblook Preview – Bottom
I was intending to cut a ‘V’ shape to allow room for the connection to run under the shim rather than use two separate pieces.
Timing being what it is, a friend of mine, Tony G1HIG, just happened to be selling a Hatfield RF Attenuator just as I finished this design. So I bought it.
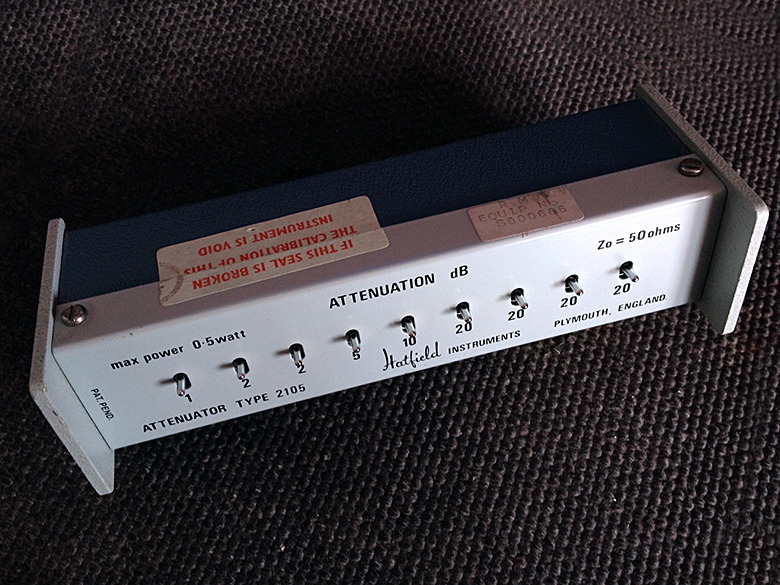
Hatfield Attenuator purchased from Tony G1HIG
This means that I won’t be getting this board fabricated and I’ve no idea if the design is viable. However, I’ll leave it for you to decide. You can access all the design files here: RF Attenuator I haven’t tidied them up as I would normally because I’m not going to use them but they should be adequate for fabrication. I use the fantastic Hackvana for all my PCB fabrication so the files have been DRC checked with them in mind.
The design is given freely with no warranty or statement of fitness for use. Build and use entirely at your own risk.